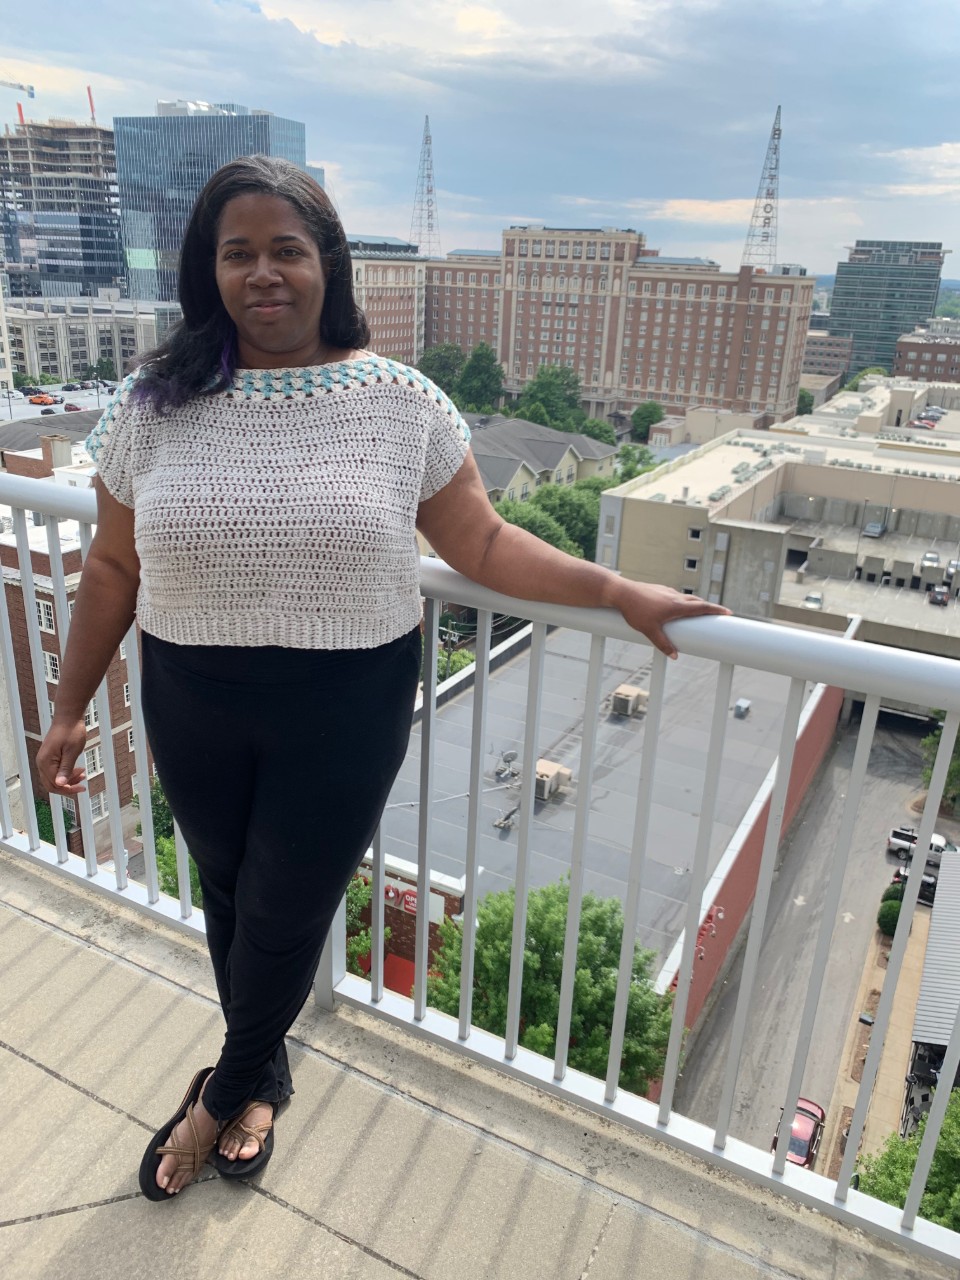
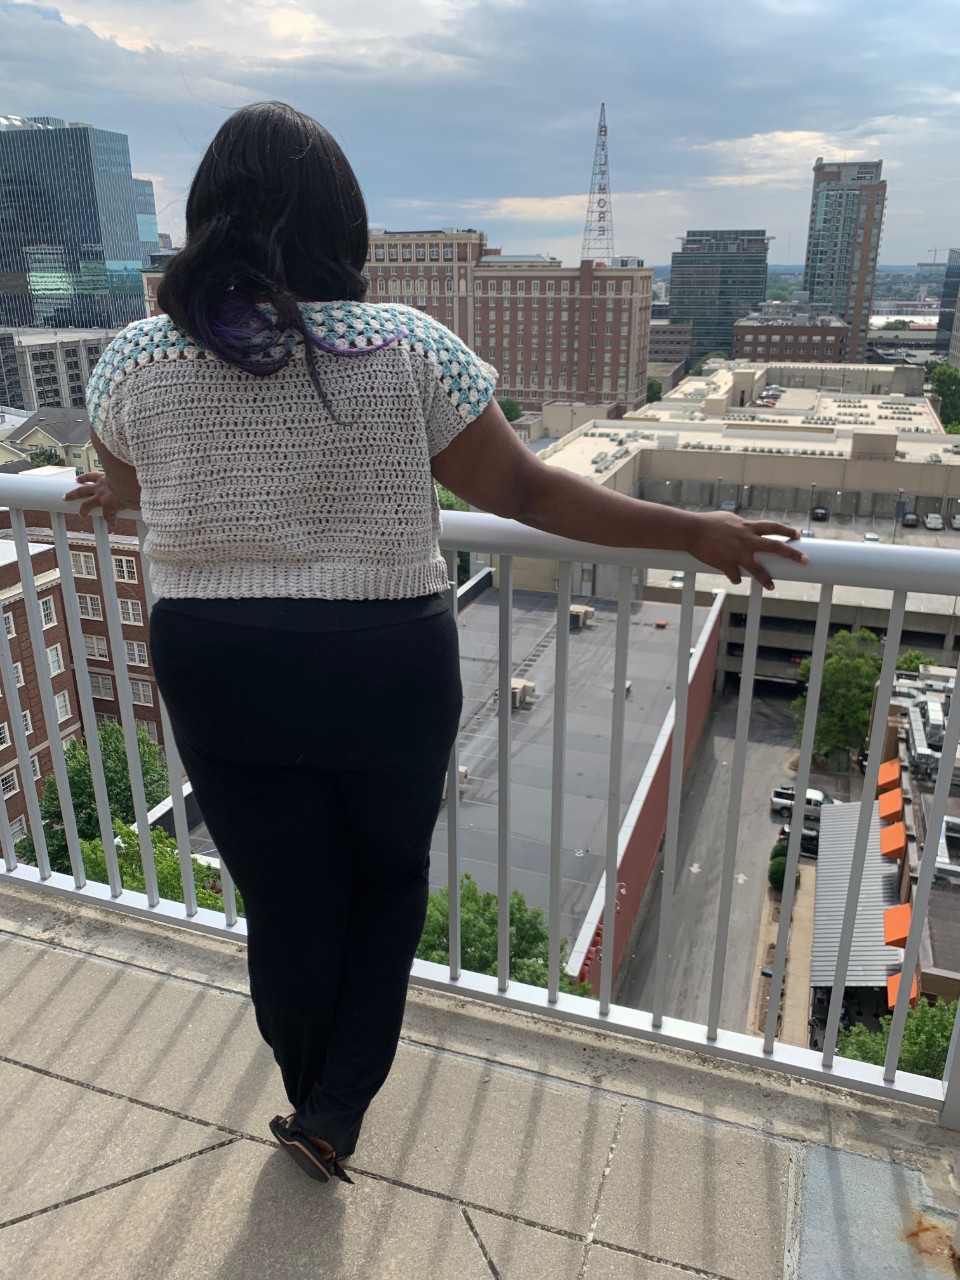
I’ve been participating in a blanket crochet-a-long on Instagram, and learning a host of new-to-me stitches along the way. One of those is the delightfully shabby chic Granny Stripe, which now features prominently in my design sketches! I decided my first incorporation of the fun cluster stitch pattern would be in “Ruth”, a top named for my favorite grandma.

The Inspiration & Design
I have been looking for breezy but full-coverage tops to wear during the Spring and Summer months when the temperatures can get well over 100 degrees. I work from home so I could just wear tshirts every day, but I like to “get dressed” regularly to keep myself on task and in proper work mode. I decided to make a shirt that could be a casual crop top with some jeans and flip flops or dressed up with a cute skirt or trousers.

The top consists of two double crocheted panels sewn together at the sides and top to form a tshirt. The ribbed bottom gives the shirt a little shape. I think the top would look great in all one color, but it’s granny stripe – so I felt like I needed to add some color pops to the shoulders.
The Yarn
I used Caron Cotton Cakes, a delightful fiber that feels like super-thin tshirt yarn. Like tshirt yarn, it doesn’t split and it’s lightweight and breathable. It’s only 60% cotton (the rest is acrylic), but it has a great feel to it and it’s good for making garments like this. I could have used just one cake to make a size Small and Medium, but I wanted to add color to it so I added stripes which used another cake. The 1X pattern requires two cakes.
PATTERN
- Get the ad-free, size 14 font, printable PDF pattern here.
- PIN this pattern to your Pinterest boards here.
- Add this pattern to your Ravelry queue or library here.
Materials:
-(as pictured) Caron Cotton Cakes: Silver Cloud, Cream, Aqua Breeze
-Size H 5.0mm crochet hook
-Large eye tapestry needle
-Stitch markers
Gauge:
9 sts in double crochet = 4 in.
6 rows = 4 in.
Finished Top Measurements:
S
Width across back: 24”
Length: 15″
M
Width across back: 26”
Length: 17″
L
Width across back: 28”
Length: 19″
XL (pictured)
Width across back: 30”
Length: 21″
Abbreviations (US terms):
CH – chain
SC – single crochet
BLO – back loop only
DC – double crochet
CL – 3 double crochets in one stitch
Skill Level:
Easy – must be familiar with basic stitches and garment construction.
Pattern Notes:
-Model is 5’9” tall.
-Top is made to fit oversized and a bit baggy. Add more rows before the granny stripe section if the top is a bit too cropped for you!
-Pattern is worked as two panels. Make both panels and then move on to the assembly section.
-Top is worked from the bottom ribbed edge up to the top granny stripes.
Panel (Make 2)
Written in XL, Small noted in ( ) Medium noted in [ ], Large noted in { }. When only one number is given, it applies to all sizes.
Ribbing
CH 9
Row 1: SC in 2nd CH from hook and in each stitch across. 8 stitches.
Row 2: CH 1, turn, SC BLO in each stitch across. 8 stitches
Repeat Row 2 to Row 82, (64), [70], {76}
This ribbed band is the width of one panel of your top. You can make it longer or shorter as needed in this step.
Do not fasten off – instead turn and work across the top of the ribbed edge to form the rest of the top from the bottom up.
Body
Row 1: CH 1, turn and SC across, one SC in each ribbed row to make the same number of stitches as you made rows in the previous step.
Row 2: CH 1, turn, DC across.
Repeat Row 2 to row 21, (15), [17], {19} for the front panel, and row 19, (13), [15], {17} for the back panel.
Granny Stripe (Optional: change color with every row)
Row 1: CH 3, turn, DC in same stitch *skip 2 stitches. CL in next stitch* repeat from * to * across to last stitch. 2 dc in last stitch.
Row 2: CH 3, turn, CL in each space between the CL from the previous row, DC in the last stitch.
Row 3: CH 3, turn, DC in the same stitch, CL in each space between the CL from the previous row, 2 DC in last stitch.
Row 4: Repeat Row 2
Row 5: Repeat Row 3
Back Panel Only
Row 6: Repeat Row 2
Row 7: Repeat Row 3
Fasten off, weave in ends.
Assembly
Place two rectangles together, whip stitch halfway up the sides with your yarn needle, creating the bottom of the shirt and the bottom of the arm hole.
Place two stitch markers where you want the neck hole to be along the top row. Whip stitch, the shoulder area together on each side of the neck hole to create the top of the arm holes.
Weave in all remaining ends, turn right side out. Enjoy!
Share your projects made using Cozy and Cheer patterns on Instagram with the hashtag #cozyandcheer!


Very nice! Like the skyline too! 🙂